Making my own website with blogdown
The first thing I’d recommend to anyone who wants to build a website from R using blogdown is to read the book of the author of this package, Yihui Xie.
Therefore, this post isn’t intended to be a guide on how to make your own website but a way to tell my experience through the process. The details of what each folder should contain within the project are fully and very well explained on the book linked above.
Before creating any R project, you obviously must install the blogdown package and not just for using the functions this package provides but also for creating the R project from RStudio. Once installed with install.packages("blogdown") you can create the project in RStudio by clicking at File –> New Project. Then you will find the following menu:
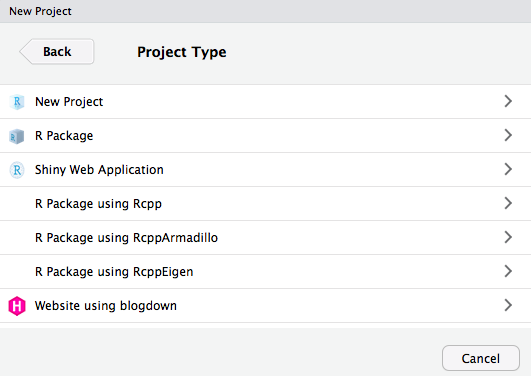
After selecting “Website using blogdown” you’ll find this:
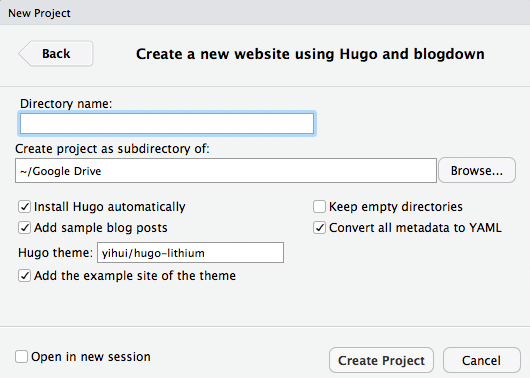
Here you can create a new R project based on the blogdown package. I’d recommend leaving all boxes options by default. The only thing I changed was the Hugo theme. Hugo is a static website engine written in Go and it’s integrated into the blogdown ecosystem. The package provides a blog theme which is originally based on the Lithium theme. For me, this template is pretty good but it’s worth checking some others available here. In particular, my choice was the minimalist Hugo Coder template.
I’m not going into the details of the folder structure but you can find further information in the book and whether you kept checked the “Add the example site of the theme” box you’ll see some example posts. In summary, even without reading the full book it’s quite acceptable to follow the code.
One of the main files is located in the project root path and it’s called config.toml. This file consists in a set of keys with their respective values separated by section names. Here you define the main parameters of your site. For instance, in my case the params section contains:
[params]
    author = "Jorge López Pérez"
    description = "Jorge's personal website"
    keywords = "blog,developer,personal"
    info = "Economist and Data Scientist"
    avatarurl = "images/autopic.jpeg"
    footercontent = ""
I think this file should be barely modified and in my particular case I just touched it for removing the second language that this theme provided and also for adding disqus.
Once the site is written and can be deployed you have several options. I strongly recommend (as the authors do) Netlify. You can sign up with you Github account and link it with Netlify. I also recommend hosting all the code in a Github repo in order to ease the deployment. I just have to note that I had some problems related to my Hugo theme, which require a certain Hugo extended version not compatible with Netlify. The issue can be found here and for me the solution was to compile the site downloading Hugo and calling it from terminal. I think the hugo_build() function in blogdown allows to do the same from R. This was neccesary just the first time for me since now every time I push my code to Github the site is compiled in Netlify. Also be aware of updating the Hugo Version in the Netlify environment variables (in my case, 0.53).
Well, this is all from my side, I hope you enjoy making your own site using blogdown and I’d really like to thank the authors for this awesome and useful package and book.